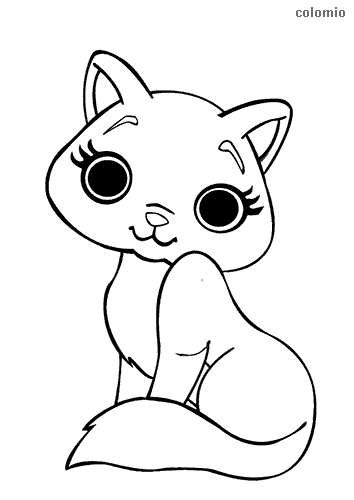
This tutorial explains step by step how to draw a pretty kitty on paper using our template. To draw a cat, you need a little practice, but the result is fantastic and can be seen!
We recommend a pencil (e.g. HB or H2), eraser, eraser-proof drawing pencil and colored pencils of your own taste for this drawing.
Step 1: The Head
Take a hard pencil, for example HB or H2. Draw the lines discreetly, as this will make them easier to erase in the event of a correction. You now sketch a head-circular circle.
Step 2: The Torso of the Cat
You roughly structure the body with two circles. The first circle is larger than the head and is slightly tilted to the right side below it. With the second oval circle, you specify the position and size of the hindquarters. This part lies under the middle circle, slightly shifted to the right, in an upright position. Compare the picture of the template.
Step 3: Legs and Tail
With a little sweep, draw the tail at the bottom right next to the oval. The tail lies on the ground in the step-by-step instructions. However, you can be creative and change the template a bit and, for example, give the cat an upright tail.
Then place the legs under the middle circle. As you can see in the template, you use small circles for the paws and the base of the legs, which you connect to the paws with strokes.
Step 4: First Permanent Contours
Now the kitty gradually takes shape. You turn to the head and put on the pointed ears. Then you connect the three main circles to form a body. Thus the cat now also has a neck. For now, parts of the legs disappear into the combined body oval.
IMPORTANT: You can trace the black lines on the template with the drawing pencil – they remain on the final image and represent the first permanent contours of the cat.
Step 5: Final Lines for Legs and Tail
Now come the first details. Work out the tail by outlining the line that was only hinted at before. You also contour the legs by widening them.
Step 6: The Face
Your cat gets a face. You paint the eyes, the nose and the mouth in the head circle and work out the paws more finely. You erase the disturbing guide lines that run over the legs beforehand.
Step 7: Removing the Guides
You reach for the eraser again and remove the remaining guide lines that do not belong in the picture. If necessary, draw the contours with the pencil. Now the cat also gets its whiskers.
Step 8: Coloring
Finally, color the cat. In this picture the cat is orange with a gray tiger, a light chest and a light muzzle. The eyes are green. Fairyl free to use other colors and create a portrait of your own cat.
Take a picture and send it to show@colomio.com – we publish it on colomio.com!
All tutorials and images are copyrighted by happycolorz GmbH. Interested in using it? Please send a mail to info@colomio.com.
More Cat Templates
More ideas for drawing
-

Airplane drawing -

Plane drawing easy -

Apple drawing -

Bicycle drawing -

Ship drawing -

Car drawing -

Car drawing easy -

Cat drawing -

Cow drawing -

Dinosaur drawing -

Dog drawing -

Puppy drawing -

Dragon drawing -

Digger drawing -

Fairy drawing -

Giraffe drawing -

Lion drawing -

Mermaid drawing -

Moon drawing -

Motorcyle drawing -

Penguin drawing -

Pig zeichnen (einfach) -

Princess drawing -

Reindeer drawing -

Rooster drawing -

Santa Claus drawing -

Shark drawing -

Sheep drawing -

Strawberry drawing -

Sunflower drawing -

Tiger drawing -

Tractor drawing -

Train drawing -

Tree drawing -

Tree drawing easy -

Tulip drawing -

Turtle drawing -

Unicorn drawing -

Unicorn drawing easy -

Witch drawing


