EasyAdvanced
With this tutorial you can draw a dog step by step and get a professional result in the end.
For preliminary drawing, you will need an easily erasable pencil, for example with a hardness of HB or H2. Use the eraser to remove the guide lines. For the permanent contours, it is best to use an eraser-proof drawing pencil. Use colored pencils to color the dog.

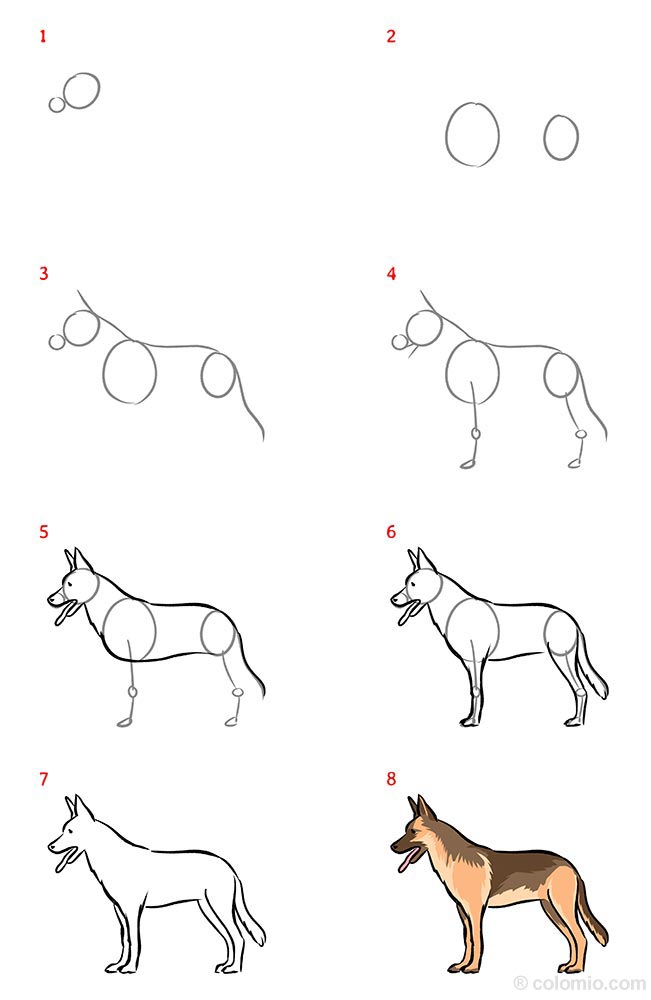
Step 1: Head and muzzle
Use the pencil to draw a slightly oval circle on the paper. This is the head. Draw a small circle at the bottom left for the snout.

Step 2: Hull
Draw another circle for the shoulder/chest area, which is drawn slightly downwards in length. With a little distance, place a smaller circle to the right of it for the back. You will find the correct positions on the template.

Step 3: Ears, neck, back & tail
You join the top edges of the three larger circles together to create the back and neck. The line continues on the right side as the tail and forms the beginnings for the ears on the head.

Step 4: Limbs
You draw the two legs of the dog facing the viewer as strokes. The paws and joints are shown as spheres. Below the “muzzle ball” you draw the lower jaw of the open mouth.

Step 5: Permanent contours for ears and face
You finely work out the ears and the muzzle with the drawing pencil. The dog gets a tongue and real ears. You can also see the nose and the eye on the side. You also draw the dog’s lower neck and connect the torso circles to form a belly.

Step 6: Finished silhouette
Use the drawing pen to trace the outer contours and finish working out the tail.

Step 7: Removing the guides
You remove all the guides and create pairs of legs by placing one opposite the legs that are already visible. You are now finished drawing.

Step 8: Coloring
You paint the tongue pink and give the fur brown and beige shades with a pattern typical of a German shepherd. The light brown dog gets a dark mask and a dark saddle.
More Template Ideas
Simple dog paint (for children)
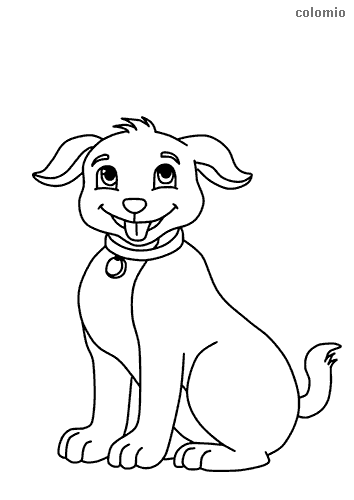
Drawing this funny dog is quite simple. Step by step, this tutorial shows you how to create a cartoon style dog on paper. Especially children have a lot of fun with this simple template.
You will need colored pencils, a pencil and an eraser-proof drawing pencil as well as an eraser.

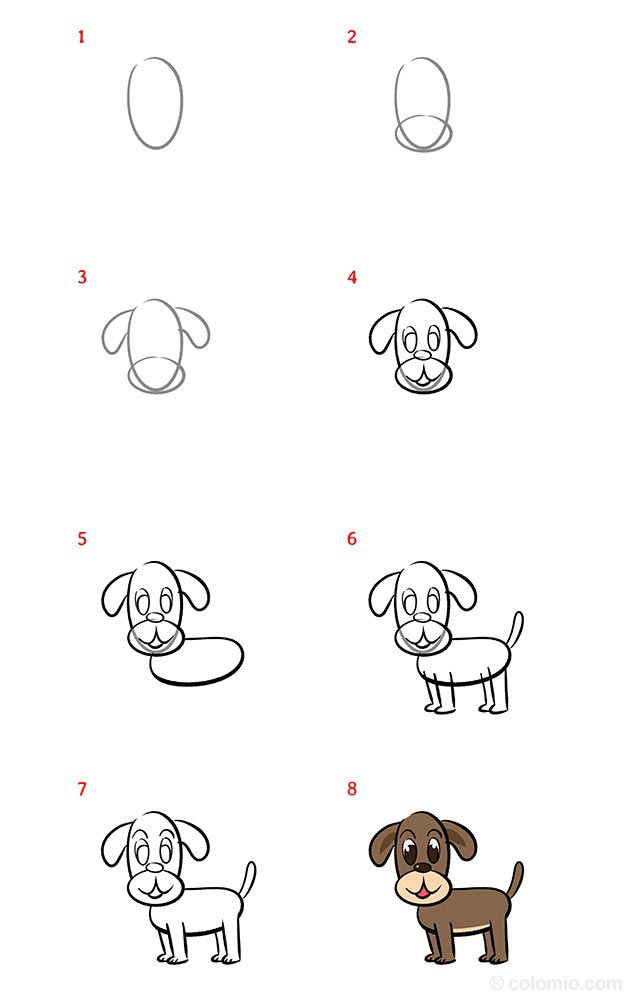
Step 1: Head
You draw with a fine pencil line an egg standing upright with the tip down. This is the head.

Step 2: Muzzle
Over the lower part you paint a small egg lying crosswise. This is the snout.

Step 3: Ears
Draw a floppy ear on the left and right side of the head.

Step 4: Permanent contours for the head
For this step you exchange the pencil for the drawing pen. Now it’s time for the face. You give the dog egg-shaped eyes and a crumpled nose. You also draw the slightly open mouth.

Step 5: Hull
Draw the body of the dog with the pencil. Look carefully at the position on the template.

Step 6: Tail and legs
You paint the tail on the rump and the dog gets his legs.

Step 7: Removing the guides
Use the pencil to trace all the remaining contours. Then erase the guide lines.

Step 8: Coloring
You put the drawing pencil aside and grab the colored pencils. Grab a brown crayon and use it to color in the fur. Leave the muzzle and belly blank. Use a beige tone for the belly and snout. The open mouth is red and the eyes have black pupils. Of course you can also paint your dog differently, for example as a white Dalmatian with black dots. Maybe your own dog can be a model for you.
Take a picture and send it to show@colomio.com – we publish it on www.colomio.com!
All tutorials and images are copyrighted by happycolorz GmbH. Interested in using it? Please send a mail to info@colomio.com.
More ideas for drawing
-

Airplane drawing -

Plane drawing easy -

Apple drawing -

Bicycle drawing -

Ship drawing -

Car drawing -

Car drawing easy -

Cat drawing -

Cow drawing -

Dinosaur drawing -

Dog drawing -

Puppy drawing -

Dragon drawing -

Digger drawing -

Fairy drawing -

Giraffe drawing -

Lion drawing -

Mermaid drawing -

Moon drawing -

Motorcyle drawing -

Penguin drawing -

Pig zeichnen (einfach) -

Princess drawing -

Reindeer drawing -

Rooster drawing -

Santa Claus drawing -

Shark drawing -

Sheep drawing -

Strawberry drawing -

Sunflower drawing -

Tiger drawing -

Tractor drawing -

Train drawing -

Tree drawing -

Tree drawing easy -

Tulip drawing -

Turtle drawing -

Unicorn drawing -

Unicorn drawing easy -

Witch drawing


